
iPhone eSIM setup guide
- Apple Support – Official Apple eSIM guide
Step 1
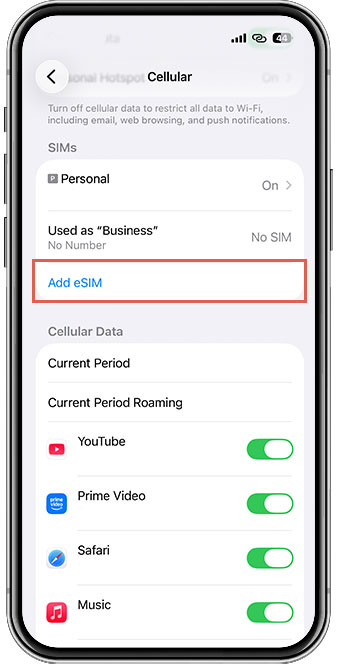
Go to Cellular Settings
(Settings > Cellular)
Tap “Add eSIM”
Step 2
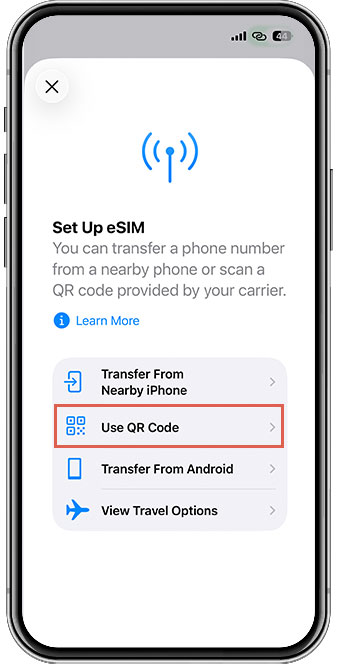
Select “Use QR Code”
Step 3
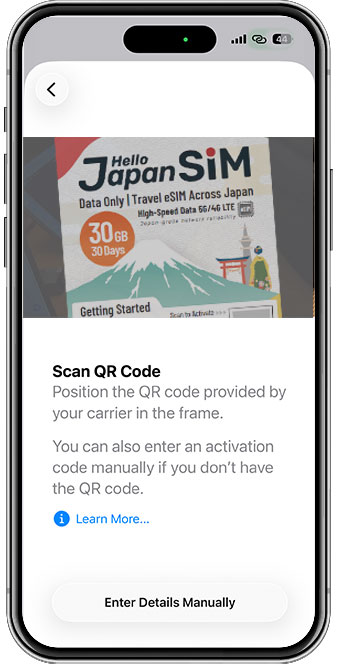
Scan the QR code provided
Step 4
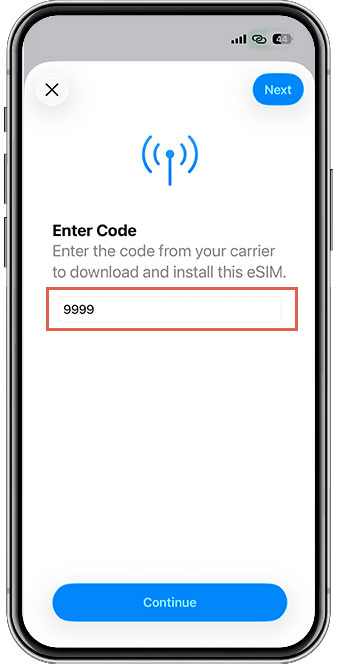
Enter “9999”
Step 5
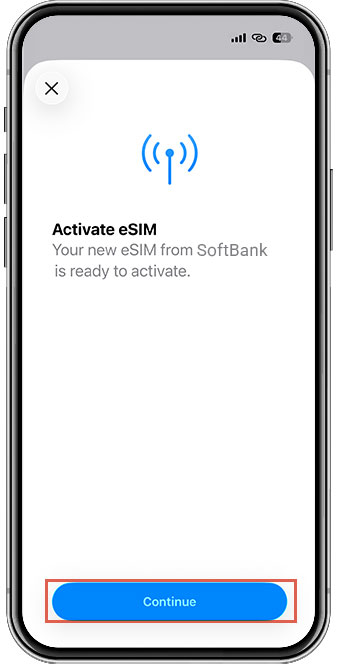
Tap “Continue” to start activation
Step 6
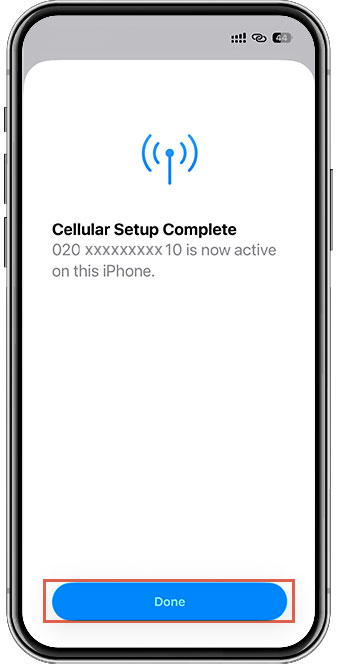
Tap “Done” once the eSIM is added
Step 7
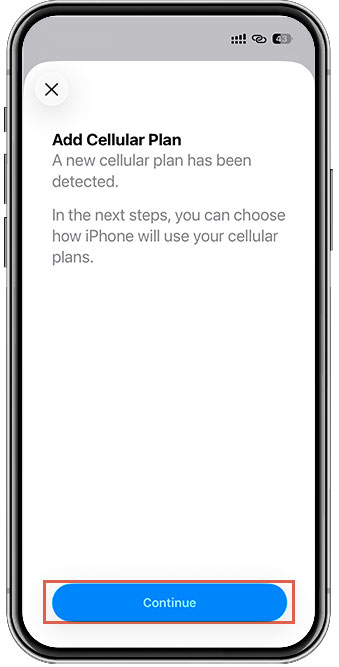
Tap “Continue” to add cellular plan
Step 8
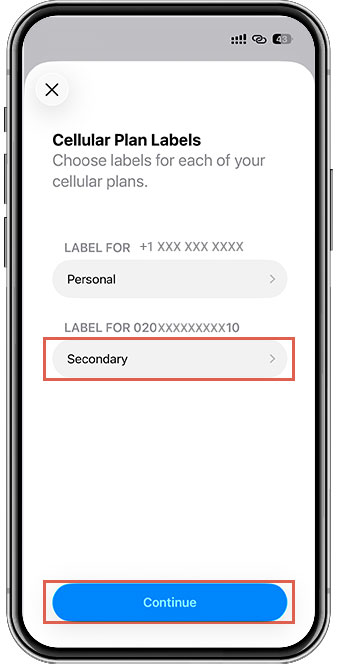
Tap “Continue” to change cellular plan labels
Step 9
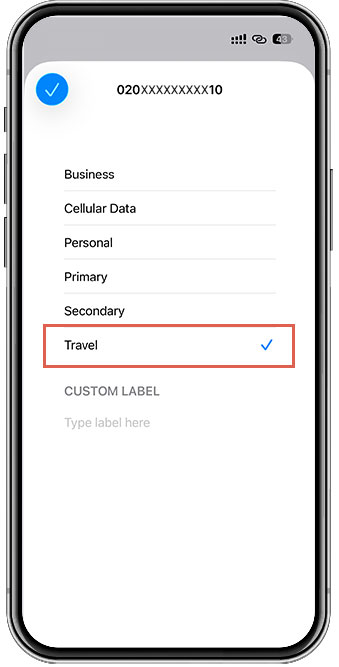
Optional: Select “Travel”
Step 10
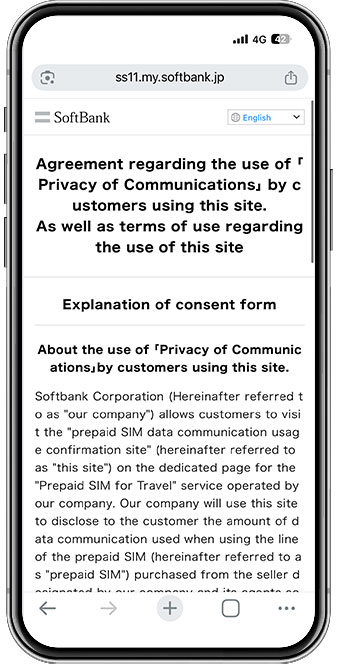
Review the Terms and Conditions (if prompted)
Step 11
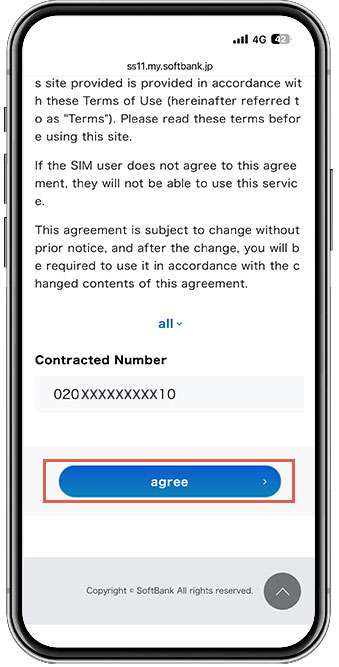
Agree to the Terms and Conditions (if prompted)
Step 12
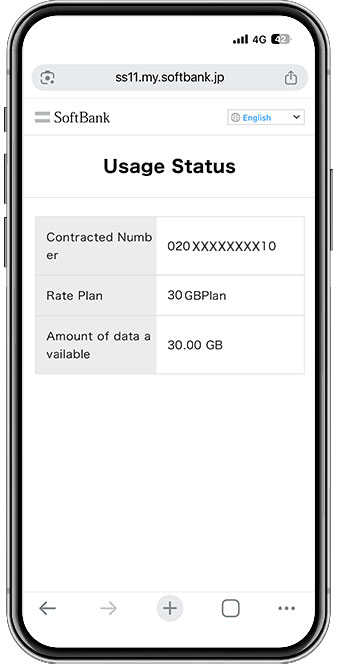
Check Connection Status in your settings
Android eSIM setup guide
- Pixel Phone Help – Set up a new eSIM
- Samsung Galaxy – eSIM Simple Setup
Note: These steps are based on Google Pixel. The interface may vary depending on your device or OS version. Please ensure your OS is updated to the latest version for the best experience.
Step 1
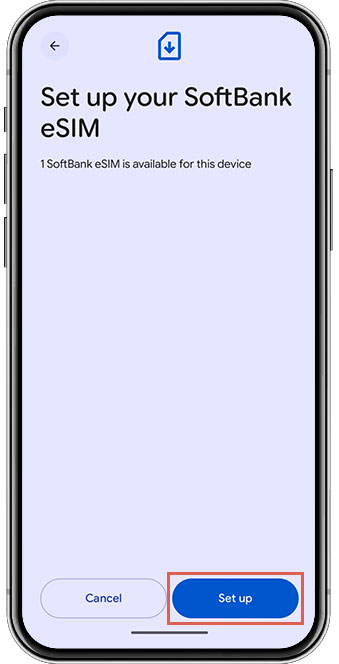
Open Camera, scan QR code, and tap “Set up”
Step 2
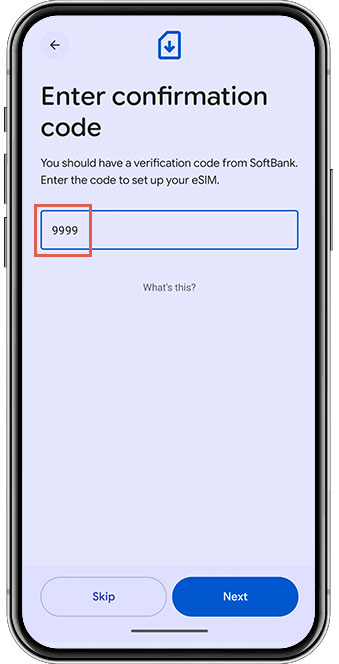
Enter “9999” as the confirmation code
Step 3
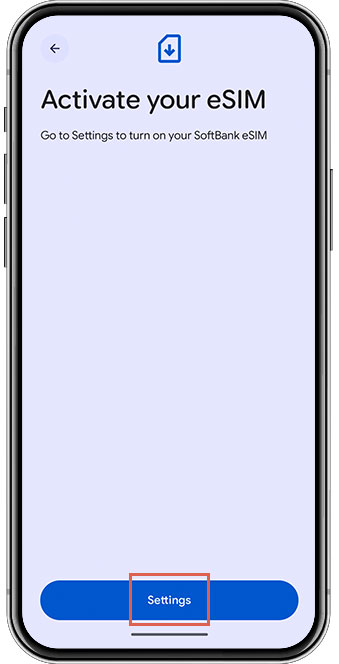
Tap “Settings” to activate your eSIM
Step 4
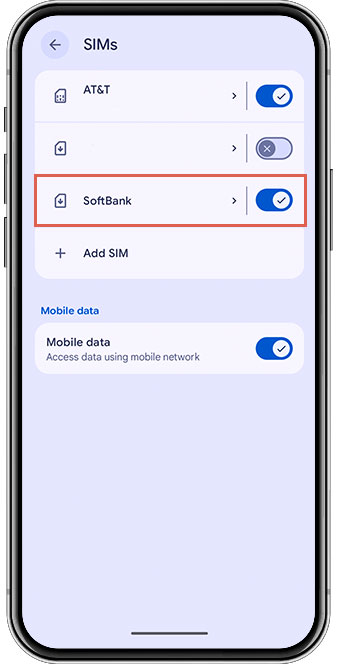
Select “SoftBank” or “Y!mobile” from the SIM list
Step 5
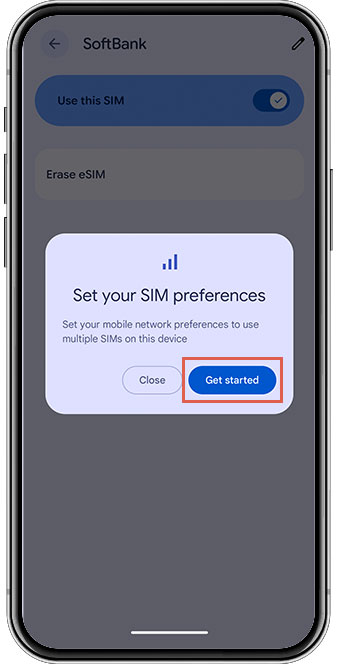
Tap “Get started” to set your preferences
Step 6
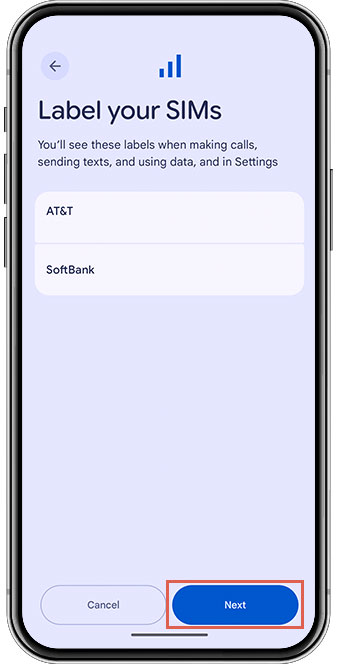
Label your SIMs and tap “Next”
Step 7
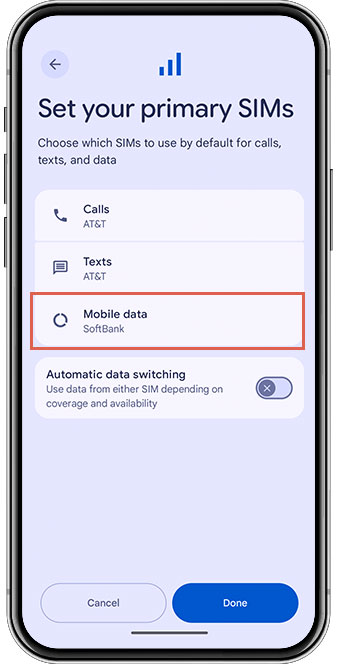
Set “SoftBank” or “Y!mobile” for Mobile Data and tap “Done”
Step 8
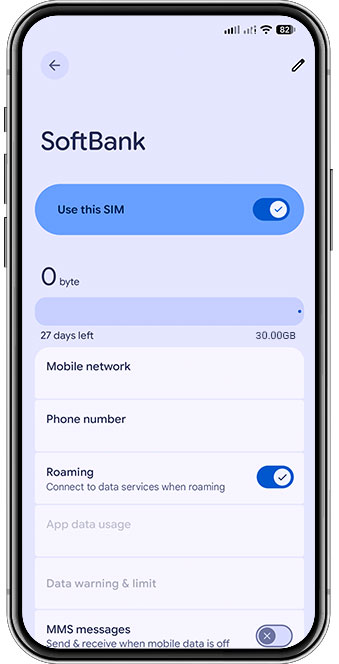
Ensure “Roaming” is turned ON